
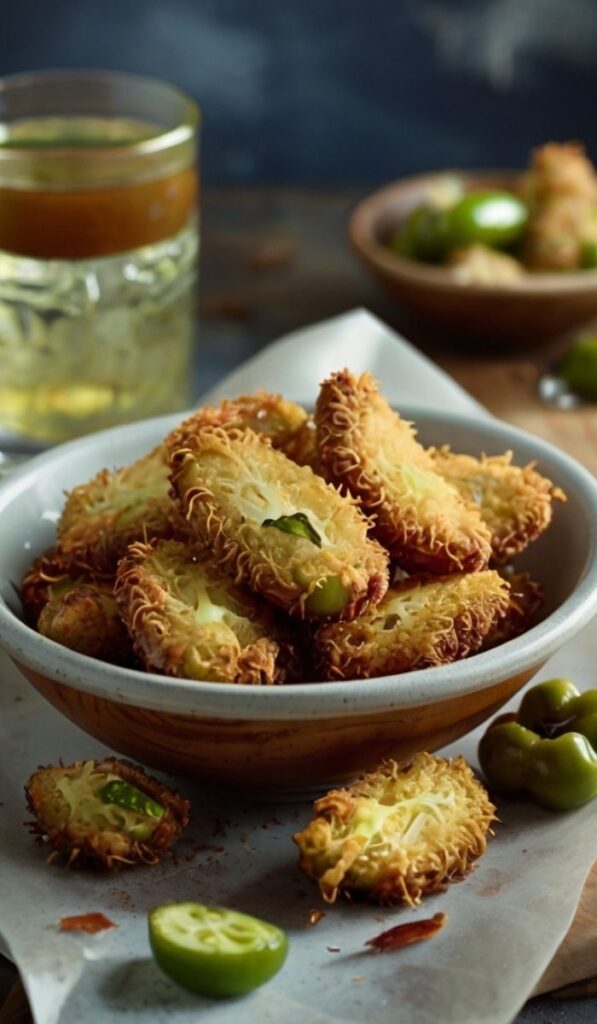
If you’re a fan of crunchy, savory snacks, there’s a good chance you’ve fallen head over heels for the famous Pluckers Fried Pickles Recipe.
These crispy delights are a favorite appetizer at Pluckers Wing Bar, known for their perfect balance of tart pickles and golden, seasoned breading.
Today, I’m excited to share with you my original Pluckers Fried Pickles Recipe that you can recreate easily at home! Whether you’re hosting a game night, a family gathering, or simply indulging in a snack craving, these fried pickles will impress everyone.
Plus, they require minimal prep time, basic ingredients, and a deep love for all things crunchy and tangy.
Let’s dive into the ultimate homemade version of this classic Texas treat, made even better with a few pro tips to make them extra crispy and delicious!
When I First Tried Pluckers Fried Pickles
The first time I tried Pluckers Fried Pickles, it was pure magic. I was at Pluckers Wing Bar with friends, and one bite into that perfectly crunchy, juicy pickle had me hooked.
I knew instantly I had to try making them at home. After lots of tweaking and experimenting, I crafted a version that tastes just as incredible—maybe even better!
Equipment You’ll Need
- Deep fryer or heavy-duty pot
- Slotted spoon or spider strainer
- Mixing bowls
- Whisk
- Paper towels
- Baking sheet
- Cooling rack
Ingredients List
For the pickles:
- 1 jar dill pickle chips (drained and patted dry)
For the batter:
- 1 cup all-purpose flour
- ½ cup cornmeal
- 1 teaspoon garlic powder
- 1 teaspoon onion powder
- 1 teaspoon paprika
- ½ teaspoon cayenne pepper
- 1 teaspoon salt
- 1 teaspoon black pepper
- 1 cup buttermilk
- 1 egg
For frying:
- Vegetable oil (for deep frying)
Optional for serving:
- Ranch dressing or spicy aioli
Step-by-Step Preparation
Step 1:
Prepare the Pickles: Drain the pickle chips and pat them dry with paper towels. This ensures the coating sticks properly.
Step 2:
Heat the Oil: Fill your deep fryer or heavy-duty pot with vegetable oil and heat to 350°F (175°C).
Step 3:
Make the Batter: In one bowl, whisk together the buttermilk and egg. In another bowl, combine the flour, cornmeal, garlic powder, onion powder, paprika, cayenne, salt, and pepper.
Step 4:
Dredge the Pickles: Dip each pickle slice into the buttermilk mixture, then dredge in the seasoned flour mixture. For extra crunch, repeat the dipping and dredging process once more.
Step 5:
Fry Until Golden: Carefully place the coated pickles into the hot oil using tongs. Fry in small batches to avoid overcrowding. Cook for about 2-3 minutes or until golden brown.
Step 6:
Drain and Serve: Remove the pickles with a slotted spoon and place them on a cooling rack or paper towel-lined baking sheet. Serve immediately with your favorite dipping sauce!
Tips for Success
- Dry the Pickles Thoroughly: Moisture is the enemy of crispy fried foods. Make sure your pickle chips are well-dried.
- Double Dredge for Extra Crispiness: Coat the pickles twice for a thicker, crunchier exterior.
- Maintain Oil Temperature: Keep your oil consistently at 350°F to avoid soggy or greasy pickles.
- Use a Cooling Rack: Letting fried pickles drain on a rack keeps them from getting soggy on one side.
- Season Immediately After Frying: A light sprinkle of salt right after frying amps up the flavor even more.
Variations
- Spicy Pluckers Fried Pickles: Add more cayenne pepper to the flour mixture or sprinkle with chili powder after frying.
- Panko-Crusted Pickles: Substitute some of the flour mixture with panko breadcrumbs for an extra crunchy texture.
- Beer-Battered Pickles: Replace buttermilk with your favorite light beer for a boozy, fluffy coating.
- Gluten-Free Fried Pickles: Use a gluten-free flour blend and cornmeal to make it safe for gluten-sensitive snackers.
- Sweet and Spicy Pickles: Try using sweet pickles or bread-and-butter pickles for a surprising twist!
Conclusion
Recreating the legendary Pluckers Fried Pickles Recipe at home is not only fun but also incredibly rewarding.
With a few pantry staples and some simple techniques, you’ll have crispy, tangy, and absolutely irresistible pickles ready in no time.
Perfect for parties, family gatherings, or a casual snack, these fried pickles are bound to become a household favorite. So grab your apron, heat up that oil, and let’s fry up some happiness!
FAQs
Are Pluckers Fried Pickles gluten-free?
The original Pluckers Fried Pickles Recipe uses all-purpose flour, which is not gluten-free.
However, you can easily swap in a gluten-free flour blend and cornmeal to make a gluten-free version without sacrificing flavor.
How should I store leftover fried pickles?
Although fried pickles are best enjoyed fresh, you can store leftovers in an airtight container in the refrigerator for up to 2 days.
To reheat, use an oven or air fryer to regain some crispiness — microwaving is not recommended for the Pluckers Fried Pickles Recipe as it can make them soggy.
Can I freeze fried pickles?
Fried pickles don’t freeze well after being cooked because the batter tends to get soggy when thawed.
However, you can freeze battered (but unfried) pickles from the Pluckers Fried Pickles Recipe, then fry them directly from frozen for a fresher crunch.
Pluckers Fried Pickles Recipe
Equipment
- Deep fryer or heavy-duty pot
- Slotted spoon or spider strainer
- Mixing bowls
- Whisk
- Paper towels
- Baking sheet
- Cooling rack
Ingredients
For the pickles:
- 1 jar dill pickle chips drained and patted dry
For the batter:
- 1 cup all-purpose flour
- ½ cup cornmeal
- 1 teaspoon garlic powder
- 1 teaspoon onion powder
- 1 teaspoon paprika
- ½ teaspoon cayenne pepper
- 1 teaspoon salt
- 1 teaspoon black pepper
- 1 cup buttermilk
- 1 egg
For frying:
- Vegetable oil for deep frying
Optional for serving:
- Ranch dressing or spicy aioli
Instructions
- Prepare the Pickles: Drain the pickle chips and pat them dry with paper towels. This ensures the coating sticks properly.
- Heat the Oil: Fill your deep fryer or heavy-duty pot with vegetable oil and heat to 350°F (175°C).
- Make the Batter: In one bowl, whisk together the buttermilk and egg. In another bowl, combine the flour, cornmeal, garlic powder, onion powder, paprika, cayenne, salt, and pepper.
- Dredge the Pickles: Dip each pickle slice into the buttermilk mixture, then dredge in the seasoned flour mixture. For extra crunch, repeat the dipping and dredging process once more.
- Fry Until Golden: Carefully place the coated pickles into the hot oil using tongs. Fry in small batches to avoid overcrowding. Cook for about 2-3 minutes or until golden brown.
- Drain and Serve: Remove the pickles with a slotted spoon and place them on a cooling rack or paper towel-lined baking sheet. Serve immediately with your favorite dipping sauce!
Notes
-
- Dry the Pickles Thoroughly: Moisture is the enemy of crispy fried foods. Make sure your pickle chips are well-dried.
-
- Double Dredge for Extra Crispiness: Coat the pickles twice for a thicker, crunchier exterior.
-
- Maintain Oil Temperature: Keep your oil consistently at 350°F to avoid soggy or greasy pickles.
-
- Use a Cooling Rack: Letting fried pickles drain on a rack keeps them from getting soggy on one side.
-
- Season Immediately After Frying: A light sprinkle of salt right after frying amps up the flavor even more.