Creating the perfect tart crust shouldn’t be hard or stressful. With this Easy Sweet Tart Crust Recipe, you’ll get a flaky, buttery, sweet base ready in no time.
Whether you’re making fruit tarts, chocolate ganache fillings, or lemon custards, this crust offers the ideal texture.
This recipe suits both beginners and seasoned bakers. It’s a kitchen staple everyone should master. Made with simple ingredients and clear steps, you’ll love the outcome.
A good tart crust is like a blank canvas—this one’s golden, sweet, and crisp. Plus, it’s versatile and pairs with many dessert fillings. Let’s get baking the easiest, tastiest tart crust ever!
When I First Discovered This Recipe
I was introduced to this Easy Sweet Tart Crust Recipe at a baking class. I fell in love instantly with its simplicity and sweet flavor. It became my go-to for all tart desserts since that day.
Equipment List
- Mixing bowls
- Measuring cups and spoons
- Rolling pin
- Tart pan (9-inch)
- Plastic wrap
- Fork
- Food processor (optional)
- Pastry cutter (if no processor)
- Oven
Ingredients List
- 1 1/4 cups all-purpose flour
- 1/2 cup unsalted butter (cold, diced)
- 1/4 cup powdered sugar
- 1 egg yolk
- 1–2 tablespoons cold water
- 1/4 teaspoon salt
- 1/2 teaspoon vanilla extract
Step-by-Step Preparation
- In a bowl, mix flour, salt, and sugar.
- Add diced cold butter into the dry mixture.
- Use pastry cutter or hands to form crumbs.
- Add egg yolk and vanilla to the mix.
- Slowly add water, one tablespoon at once.
- Mix until dough begins to come together.
- Form dough into a ball and flatten slightly.
- Wrap in plastic wrap and chill 30 minutes.
- Preheat oven to 375°F (190°C) during chilling.
- Roll dough on floured surface until 1/8 inch thick.
- Gently place rolled dough into tart pan.
- Press it firmly into corners and trim edges.
- Prick base with a fork to avoid bubbles.
- Chill crust in tart pan for 10 more minutes.
- Bake crust for 15–18 minutes or golden brown.
- Cool completely before adding your tart filling.
Recipe Tips
- Always use cold butter for flakier texture.
- Chill dough before and after shaping.
- Don’t skip pricking holes—it prevents puffing.
- Use pie weights for even baking, if desired.
- Avoid overmixing to keep crust tender.
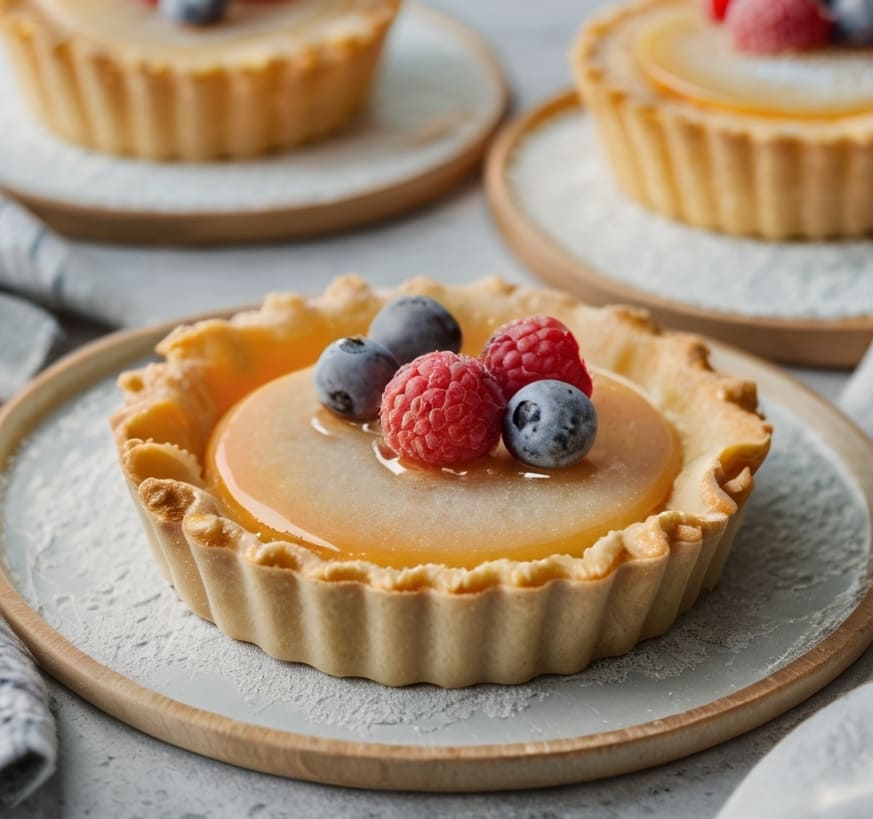
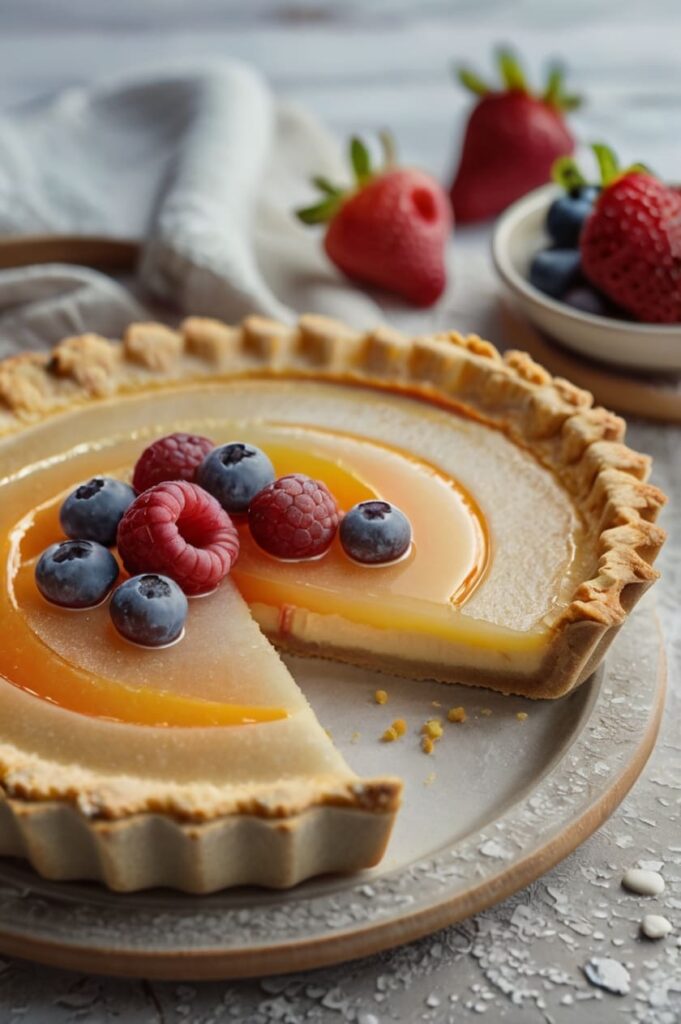
What Can You Serve With This Easy Sweet Tart Crust Recipe?
1. Fresh Berry Filling
Top with whipped cream and assorted fresh berries. Sweet and refreshing.
2. Chocolate Ganache
Pour ganache into the crust and chill. A decadent dessert.
3. Lemon Curd
Tart and tangy filling balances sweet crust perfectly.
Conclusion
This Easy Sweet Tart Crust Recipe is a must-try for dessert lovers. It’s simple, sweet, and turns out perfect every time.
Whether you’re hosting a party or just baking for fun, this crust is the best base for creative fillings.
You’ll impress everyone with minimal effort. Once you try it, it’ll become your favorite too!

Easy Sweet Tart Crust Recipe
Ingredients
- 1 1/4 cups all-purpose flour
- 1/2 cup unsalted butter cold, diced
- 1/4 cup powdered sugar
- 1 egg yolk
- 1 –2 tablespoons cold water
- 1/4 teaspoon salt
- 1/2 teaspoon vanilla extract
Instructions
- In a bowl, mix flour, salt, and sugar.
- Add diced cold butter into the dry mixture.
- Use pastry cutter or hands to form crumbs.
- Add egg yolk and vanilla to the mix.
- Slowly add water, one tablespoon at once.
- Mix until dough begins to come together.
- Form dough into a ball and flatten slightly.
- Wrap in plastic wrap and chill 30 minutes.
- Preheat oven to 375°F (190°C) during chilling.
- Roll dough on floured surface until 1/8 inch thick.
- Gently place rolled dough into tart pan.
- Press it firmly into corners and trim edges.
- Prick base with a fork to avoid bubbles.
- Chill crust in tart pan for 10 more minutes.
- Bake crust for 15–18 minutes or golden brown.
- Cool completely before adding your tart filling.
Notes
- Always use cold butter for flakier texture.
- Chill dough before and after shaping.
- Don’t skip pricking holes—it prevents puffing.
- Use pie weights for even baking, if desired.
- Avoid overmixing to keep crust tender.